Understanding the Value of a Backyard Covered Patio
A backyard covered patio is not just an outdoor space; it’s an extension of your home, a place where you can create memories, and a sanctuary that offers a myriad of benefits. In this chapter, we will delve into the intrinsic value of building plans for backyard covered patio.
1.1. An Outdoor Haven
Your backyard covered patio can become your personal haven, a space where you can escapefrom the hustle and bustle of daily life. Whether you seek solace in a good book, wish to host intimate gatherings, or simply want to enjoy a cup of coffee while listening to the soothing sounds of nature, a covered patio provides the ideal setting. It offers the best of both worlds—being outdoors while shielded from the elements.
1.2. Protection from the Elements
One of the primary advantages of a covered patio is protection from the elements. Whether it’s a scorching summer day or a sudden downpour, your covered patio ensures you can enjoy your outdoor space without being at the mercy of weather fluctuations. It provides shade from the sun’s harsh rays and shelter from rain, allowing you to make the most of your outdoor area year-round.
1.3. Increased Property Value
Investing in a backyard covered patio is not only an investment in your lifestyle but also in your property. When done right, a well-designed and well-maintained covered patio can significantly boost your home’s resale value. Potential buyers are often drawn to properties that offer functional and aesthetically pleasing outdoor spaces.
1.4. Versatility and Customization
Your backyard covered patio is a canvas waiting to be customized to your preferences. Whether you envision a cozy lounge area, an outdoor dining space, or a combination of both, the versatility of a covered patio allows you to tailor it to your lifestyle and needs. You can choose the materials, furnishings, and decor that resonate with your style.
In Summary
A backyard covered patio is more than just an outdoor structure; it’s an investment in your well-being and property. It offers a sheltered haven, protection from the elements, increased property value, and the freedom to customize it according to your preferences. In the next chapters, we’ll explore the various aspects of planning, designing, and building your own backyard covered patio, so you can enjoy its benefits to the fullest.
Chapter 2: Patio Cover Design Inspiration
When embarking on the journey to create your dream backyard covered patio, one of the most exciting phases is finding design inspiration. This chapter will guide you through the world of patio cover styles, materials, aesthetics, and functional additions, helping you transform your outdoor space into a true oasis.
2.1. Exploring Different Patio Cover Styles
Choosing the right style for your patio cover is essential to achieve the look and feel you desire. Here are some popular patio cover styles to consider:
Gable Roof
- A classic and timeless choice.
- Provides a sense of openness and grandeur.
- Ideal for larger patio areas.
Flat Roof
- Modern and minimalist in design.
- Complements contemporary homes.
- Offers clean lines and a sleek appearance.
Pergola
- A beautiful, open-roof structure.
- Allows vines and plants to grow for natural shade.
- Perfect for a rustic or garden-inspired look.
Lattice or Shade Sail
- Delicate and semi-shaded options.
- Great for filtering sunlight while still offering some protection.
- Lattice can be customized with climbing plants.
Solid Insulated Roof
- Maximum protection from the elements.
- Excellent insulation for temperature control.
- Versatile in design, suitable for various styles.
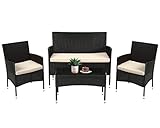
- ✔〖EASY ASSEMBLY〗: This Outdoor Furniture Set Comes With All Hardware & Necessary Tools. Follow The Instruction, You Can Easily And Quickly Assemble The Patio Sofa Set.NOTE: When you try to install the Patio Furniture Set, try to line the hole together in all side, do not over tight one hole, then try to tight it slowly in each side.
- ✔〖SIMPLE AND ELEGANT〗:The cushions of the patio furniture set use a high-density rebound sponge to give you a comfortable sitting feel.Patio Wicker Sofa Set Built As High Quality Metal Frame With Resilient PE Rattan, Black Synthetic Resin Wicker Outdoor Garden Conversation Set Designed For The Outdoors, Weather Resistant Design And UV Resistan0t. Patio Wicker Sofa Furniture Set Patio Furniture Set Wicker Furniture Set Wicker Sofa Set Outdoor Garden Conversation Set.
- ✔〖HUMANIZED DESIGN〗:Thickly Cushioned Wicker Patio Sofa Set Chairs For Maximum Comfort, Patio Outdoor Sofa Gives You A Excellent Seating Experience.Our Garden Outdoor Conversation Set have strong feet to protect your floor and increase the stability of your furniture.This outdoor furniture set can be used in the courtyard, backyard, porch, garden, poolside, balcony. Patio Sofa Outdoor Furniture Set Wicker Sofa Set Rattan Furniture Set.
- ✔〖STRONG AND STURDY〗:This patio furniture set is made with a powder-coated steel frame and all-weather PE rattan wicker for a comfortable experience.The wicker of the Outdoor furniture set is sturdy but also very light. The seat cushion of this patio Conversation Set can be removed for easy cleaning. Outdoor Furniture Set Patio Wicker Furniture Set Patio Sofa Garden Conversation Set.
- ✔〖CONVENIENT CLEANING〗:The table in the patio furniture set is made of high-quality tempered glass for drinks, food and any beautiful decorations.Our Outdoor Patio Wicker Sofa Sets all kinds of outdoors. Style and settings, convenient storage, save space.Our outdoor conversation set is modern and stylish, easy to maintain and suitable for any size space. Wicker Furniture Set Wicker Sofa Set Outdoor Garden Conversation Set Patio Wicker Sofa Furniture Set Patio Furniture Set
2.2. Choosing the Right Materials for Your Patio Cover
Selecting the right materials is crucial for both durability and aesthetics. Consider these materials for your patio cover:
Wood
- Offers a natural, warm, and timeless look.
- Requires regular maintenance to prevent decay.
- Ideal for classic and rustic designs.
Aluminum
- Lightweight,durable, and low-maintenance.
- Resistant to rust and corrosion.
- Suitable for modern and sleek designs.
Vinyl
- Highly weather-resistant and easy to clean.
- Available in various colors and styles.
- A great choice for those seeking a low-maintenance option.
Polycarbonate Panels
- Provides UV protection and natural light.
- Suitable for pergola-style covers.
- Offers a modern and airy feel.
2.3. Incorporating Aesthetics: How to Blend Your Patio with Your Home
Harmonizing your patio cover with your home’s architecture is essential for a cohesive and visually pleasing result. Consider these tips:
- Match roofing materials and colors with your home’s roof.
- Complement your home’s exterior color palette in your patio cover design.
- Incorporate elements from your home’s style, such as trim details or columns.
2.4. Functional Additions: Outdoor Kitchens, Firepits, and More
Elevate your outdoor living experience by adding functional elements to your patio cover:
Outdoor Kitchen
- Ideal for entertaining and cooking alfresco.
- Includes appliances like grills, sinks, and countertops.
- Creates a completeoutdoor dining experience.
Firepit or Fireplace
- Adds warmth and ambiance.
- Extends the usability of your patio into cooler months.
- Provides a cozy gathering spot.
Ceiling Fans and Lighting
- Enhances comfort and usability during hot summer days.
- Illuminates the space for evening enjoyment.
- Choose fixtures that complement your design.
Seating and Furniture
- Select comfortable and weather-resistant furniture.
- Create distinct seating areas for various activities.
- Accessorize with cushions, rugs, and outdoor decor.
Greenery and Landscaping
- Use potted plants, hanging baskets, and flower beds.
- Integrate landscaping to soften the patio’s edges.
- Add a touch of nature to your design.
In Summary
Designing your backyard covered patio is a creative and inspiring endeavor. Explore various styles, choose the right materials, harmonize your design with your home, and consider functional additions to make your outdoor space both beautiful and functional. In the following chapters, we will dive deeper into the practical aspects of bringing your patio cover vision to life.
Chapter 3: Getting Started: The DIY Approach
As you venture into the world of building your backyard covered patio, it’s essential to start with a solid plan. Chapter 3 focuses on the DIY approach, helping you assess your skills, gather the necessary tools and materials, prioritize safety, and create a comprehensive project timeline.
3.1. Assessing Your DIY Skills and Comfort Level
Before you begin any construction project, it’s crucial to evaluate your skills and comfort level with DIY work. Consider the following aspects:
- Previous Experience: Have you tackled DIY projects before, especially those involving construction or carpentry?
- Comfort with Tools: Are you familiar with the tools required for building a patio cover, or are you willing to learn?
- Time Commitment: Do you have the time to dedicate to this project, including potential setbacks or learning curves?
- Budget: Does a DIY approach align with your budget, or would professional installation be more cost-effective in the long run?
3.2. Gathering the Essential Tools and Materials
To ensure a smooth DIY patio cover project, you’ll need a range of tools and materials. Here’s a basic list to get you started:
Tools:
- Measuring Tape: For precise measurements.
- Circular Saw: To cut materials accurately.
- Power Drill: For drilling holes and driving screws.
- Level: To ensure everything is straight and plumb.
- Ladder: For access to higher areas.
- Safety Gear: Including gloves, safety glasses, and ear protection.
- Workbench: A sturdy surface for cutting and assembly.
Materials:
- Lumber: Depending on your design, you’ll need various sizes of treated or weather-resistant wood.
- Fasteners: Nails, screws, and anchors to secure your structure.
- Concrete: For footings and post anchors.
- Roofing Materials: Such as shingles, metal roofing, or polycarbonate panels.
- Hardware: Hinges, brackets, and connectors.
- Paint or Stain: For finishing touches.
3.3. Safety First: Tips for a Secure DIY Patio Cover Project
Safety should always be a top priority when undertaking a DIY patio cover project. Here are some essential safety tips:
- Educate Yourself: Familiarize yourself with the safe operation of all tools and equipment.
- Protective Gear: Wear appropriate safety gear, including eye protection, ear protection, and gloves.
- Follow Instructions: Read and follow the manufacturer’s instructions for all tools and materials.
- Weather Awareness: Be mindful of weather conditions that could make the work area unsafe, such as high winds or rain.
- Buddy System: Whenever possible, have a friend or family member assist you, especially with heavy lifting or working at heights.
3.4. Creating a Comprehensive Project Timeline
A well-structured timeline can help you stay organized and on track throughout your patio cover project. Here’s a simplified example of how you can create a project timeline:
- Planning and Design (1-2 Weeks):
- Decide on the patio cover style and dimensions.
- Create a detailed materials list.
- Develop a blueprint or sketch of your design.
- Permit and Regulation Research (2-3 Weeks):
- Check local building codes and regulations.
- Apply for necessary permits and approvals.
- Gathering Materials (1-2 Weeks):
- Order or purchase all required materials.
- Ensure everything is on-site and organized.
- Foundation and Framing (2-4 Weeks):
- Dig and pour footings or set post anchors.
- Construct the frame of your patio cover.
- Roofing and Finishing (1-2 Weeks):
- Install roofing materials.
- Add any finishing touches, such as paint or stain.
- Final Inspections (Varies by Location):
- Schedule inspections as required by local regulations.
- Enjoy Your Patio (Ongoing):
- Once your project passes inspection, it’s time to relax and enjoy your new outdoor space.
This timeline is a general guideline, and your specific project may take more or less time based on its complexity and your skill level.
In Summary
Getting started with a DIY patio cover project involves assessing your skills, gathering tools and materials, prioritizing safety, and creating a detailed project timeline. As you move forward, the next chapters will guide you through the step-by-step construction process and customization options for your outdoor oasis.
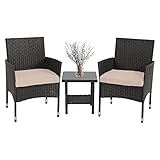
- ❤ Outdoor & Indoor-Thickly Cushioned Wicker Patio Set Chairs For Maximum Comfort, Outdoor Bistro Set Gives You A Excellent Seating Experience.Our Garden Outdoor Conversation Set have strong feet to protect your floor and increase the stability of your furniture. Rattan Chair Dimension: 23″ x 23″ X 33 (L X W X H),Table Dimension: 16″ x 16″ x 16” (L X W X H)
- ❤Easy & Quick Assemble-This Patio Furniture Set Comes With All Hardware & Necessary Tools. Follow The Instruction, You Can Easily And Quickly Assemble The Patio Chair Set.The patio set is perfect for a small backyard or balcony, and serves as a relaxing place to enjoy time outdoors.
- ❤ Wide Applications-The cushions of the patio bistro set use a high-density rebound sponge to give you a comfortable sitting feel.The patio set is simple and stylish,it will be perfect for decorating your yard, poolside, balcony, patio and home.Outdoor set features and elegant glass top side table perfect for a couple glasses of wine or the morning coffee and newspaper.
- ❤Comfortable & Convenient-The table in the patio set is made of high-quality tempered glass for drinks, food and any beautiful decorations.Our Outdoor Patio Wicker Sets all kinds of outdoors. Style and settings, convenient storage, save space.This patio set is designed to be modern and stylish with a low-maintenance feature.
- ❤Sturdy & Durable-This patio furniture set is made with a powder-coated steel frame and all-weather PE rattan wicker for a comfortable experience.The wicker of the Outdoor furniture set is sturdy but also very light. The seat cushion of this patio Conversation Set can be removed for easy cleaning.
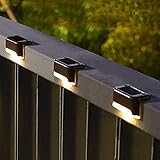
- 【Warm Light without Dazzling】Warm white led of this deck light is enough for you to illuminate your fence, deck, step, patio, balcony, yard or garden, which is safer for the whole family to go downstairs at night.
- 【Automatic Work Mode】The solar stair light has no switch, just pull out the insulator tab to use. On sunny days, it takes only 4-5 hours to be fully charged. It can turn on automatically at dusk and turn off at dawn.
- 【Widespread Use】The solar fence lights outdoor perfect for illuminating stairs, paths, gardens, decks, also use lighting front door, back yard, driveway, garage, outdoor wall and so on.
- 【Easy Installation】The deck lights solar powered can be installed in anywhere that can be fixed with screws. The size is suit for the deck, no worry about tripping.
- 【Waterproof and Warranty】With hard ABS shell and high quality solar panel, the solar deck light is designed to withstand rain, wind, or small snowy days. What’s more, in any case you have problem, just contact us, we will help you solve the problem as soon as possible.
Chapter 4: Step-by-Step Construction Guide
Now that you’ve assessed your skills, gathered your tools and materials, and are committed to your DIY patio cover project, it’s time to dive into the construction process. Chapter 4 provides a step-by-step guide to building your backyard haven, ensuring it stands strong against the elements.
4.1. Establishing a Strong Foundation: Footings and Posts
Footing Preparation
Before you start building your patio cover, it’s essential to establish a solid foundation. This typically involves creating footings and setting posts. Here’s how:
- Digging Holes: Dig holes in your selected locations, typically at each corner of your patio cover.
- Determining Size: The size of the holes depends on your local building codes and the size of your patio cover. Typically, holes should be at least 18 inches deep and 8-12 inches in diameter.
- Adding Gravel: Fill the bottom of each hole with gravel to promote drainage.
- Installing Form Tubes: Place form tubes into each hole, extending above ground level.
- Mixing Concrete: Prepare concrete mix according to the manufacturer’s instructions.
- Pouring Concrete: Fill the form tubes with concrete, ensuring they are level and plumb. Allow the concrete to cure as directed.
Setting Posts
Once your footings are in place, it’s time to set your posts:
- Attaching Post Anchors: Attach post anchors to the tops of your cured concrete footings.
- Cutting Posts: Cut your treated lumber posts to the desired height, allowing for the height of your beams.
- Securing Posts: Set the posts into the post anchors, making sure they are level and plumb. Secure them in place with anchor bolts.
- Checking Alignment: Double-check that your posts are precisely aligned with your patio cover’s design.
4.2. Framing Your Patio Cover: Beams, Braces, and Rafters
With your posts securely in place, it’s time to frame your patio cover. This involves creating the primary support structure with beams, braces, and rafters:
- Installing Beams: Attach beams to the tops of your posts, ensuring they are level and properly aligned.
- Adding Braces: To enhance stability, add diagonal braces between posts and beams.
- Positioning Rafters: Measure, cut, and position your rafters perpendicular to the beams. The spacing between rafters depends on your chosen roofing material.
- Bracing Rafters: Install additional braces between rafters for added support.
4.3. Roofing Solutions: Shingles, Metal, or Polycarbonate Panels
Choosing the right roofing material is a crucial decision in your patio cover project. Each option has its advantages:
- Shingles: Asphalt shingles are a common choice for a more traditional look and durability.
- Metal Roofing: Metal roofing offers excellent longevity and is resistant to weather and pests.
- Polycarbonate Panels: These lightweight panels provide protection while allowing natural light to filter through.
4.4. Ensuring Proper Drainage and Gutter Systems
Proper drainage is essential to prevent water buildup on your patio cover. Here are key considerations:
- Slope: Ensure your roof has a slight slope to allow water to run off effectively.
- Gutters and Downspouts: Install gutters and downspouts to direct water away from the patio area.
- Waterproofing: Apply appropriate waterproofing materials to your roofing to prevent leaks.
By following these steps, you’ll establish a solid foundation, create a sturdy frame, select the right roofing material, and ensure proper drainage for your DIY patio cover. In the upcoming chapters, we’ll explore ways to customize your cover and keep it in pristine condition for years to come.
Chapter 5: Customizing Your Patio Cover
As your patio cover takes shape, it’s time to add those personal touches that will turn it into your ideal outdoor oasis. Chapter 5 explores the world of customization, helping you create a patio cover that perfectly complements your style and needs.
5.1. Adding Personal Touches: Paint, Stain, and Finishing
Paint and Stain
Transform the appearance of your patio cover with paint or stain:
- Painting: Choose colors that match your home’s exterior or create a bold contrast. Outdoor-specific paint ensures longevity.
- Staining: Highlight the natural beauty of wood with a variety of stain shades. Stains also provide protection against UV rays and moisture.
Finishing Touches
Consider these finishing touches:
- Sealers and Protectants: Apply sealers or protectants to enhance the longevity of your patio cover. These products shield against weather and wear.
- Decorative Hardware: Select decorative hardware like brackets and fasteners to add style and flair to your design.
5.2. Outdoor Furniture and Decor Ideas
Your patio cover deserves comfortable and stylish furniture:
- Seating: Opt for weather-resistant seating options like wicker, teak, or aluminum. Cushions and pillows should also be designed for outdoor use.
- Dining Sets: Create an outdoor dining area with a table and chairs suitable for both casual meals and entertaining guests.
- Decor and Accessories: Add character with outdoor rugs, throw pillows, lanterns, and potted plants. Consider your patio cover’s aesthetic when selecting decor.
5.3. Lighting Your Patio: Ambiance and Security
Effective lighting enhances both ambiance and security:
- Ambient Lighting: Soft, ambient lighting creates a warm and inviting atmosphere. String lights, lanterns, and wall sconces are excellent choices.
- Task Lighting: Install task lighting for specific areas, such as reading nooks or cooking spaces. Pendant lights over dining tables are both functional and stylish.
- Security Lighting: Ensure safety with motion-activated or pathway lighting. These lights deter intruders and provide visibility.
5.4. Privacy Screens and Curtains
Create privacy and shade:
- Screens: Install privacy screens made from wood, metal, or fabric. These screens not only provide seclusion but also enhance the design of your patio cover.
- Curtains: Outdoor curtains offer flexibility. You can draw them for shade, privacy, or a touch of elegance. Choose weather-resistant fabrics.
Customizing your patio cover allows you to shape it into a space that reflects your personality and fulfills your outdoor living dreams. In the following chapters, we’ll delve into the nitty-gritty of maintaining your patio cover and explore cost considerations for your project.
Chapter 6: Maintaining Your Patio Cover
Maintaining your patio cover is essential to ensure it remains a beautiful and functional addition to your outdoor space for years to come. In this chapter, we’ll explore the various aspects of patio cover maintenance and how to keep it in excellent condition throughout the seasons.
6.1. Routine Cleaning and Maintenance
Regular cleaning and maintenance tasks will help preserve the appearance and functionality of your patio cover:
- Cleaning Surfaces: Depending on your patio cover material, clean surfaces regularly to remove dirt, dust, and debris. A soft brush or a pressure washer can be used, but be gentle with delicate materials.
- Inspecting for Damage: Routinely inspect your patio cover for signs of wear and tear, such as cracks, loose fasteners, or damaged roofing. Address any issues promptly to prevent further damage.
- Clearing Gutters and Drains: Ensure that gutters and drainage systems are free from debris. Clogged gutters can lead to water damage and leaks.
6.2. Seasonal Preparations: Winterizing and Summer Upkeep
Different seasons require specific maintenance tasks to protect your patio cover:
- Winterizing: Before the winter season, inspect and clean your patio cover thoroughly. Ensure that all fasteners are secure and that the roof can withstand the weight of snow. Consider removing any heavy snow buildup to prevent damage.
- Summer Upkeep: In the summer, focus on shading and cooling elements. Clean and lubricate moving parts like retractable awnings or shades. Ensure that plants and vines, if present, don’t cause damage or block airflow.
6.3. Repairing Damages: Tips for Longevity
Repairing minor damages promptly can prevent them from becoming major issues:
- Patch or Seal Leaks: If you notice any leaks, patch or seal them to prevent water from entering your patio space. Address roof damage promptly to avoid costly repairs.
- Replace Damaged Parts: If any components of your patio cover are severely damaged, such as beams or rafters, replace them to maintain structural integrity.
- Refinish as Needed: Depending on your patio cover’s material, periodic refinishing may be necessary to protect it from the elements.
6.4. When to Seek Professional Help
While many maintenance tasks can be performed by homeowners, some situations may require professional assistance:
- Structural Issues: If you notice significant structural problems, such as sagging or instability, consult a structural engineer or contractor for a thorough assessment.
- Roofing Repairs: Roofing issues should be addressed by a professional roofer to ensure proper repairs and prevent further damage.
- Electrical Components: If your patio cover includes electrical features like lighting, it’s best to hire a licensed electrician for maintenance and repairs.
By following a regular maintenance schedule and addressing issues promptly, you can extend the lifespan of your patio cover and enjoy a comfortable outdoor space year-round. In the upcoming chapter, we’ll delve into the financial aspects of building a patio cover and help you make informed decisions about your project’s cost.

- ★ DEARTAGNAN MOSQUITO INCENSE STICKS 50 PIECES
- ★ REPELLENT INCENSE STICKS Are 50 STICK With Burnt Time of 40-45 MIN Approximately (wind May Reduce Burn Time) You Will Receive 50 Repellent Incense Sticks
- ★ NATURAL INGREDIENTS made with plant based ingredients- DEET FREE and pet friendly – Smell Pleasant While Deterring Unwanted Guests / DEET FREE — Our Repellent Incense sticks are completely DEET FREE.
- ★ MOSQUITOS OUTDOOR PROTECTION our repellent incense sticks are useful to deter mosquitoes especially around your favorite outdoor spaces – swimming pool, backyard, porch, patio, camping, picnic, fishing or just working at the garage during mosquito season.
- ★ MOSQUITO REPELLENT FOR PATIO OR ANY OUTDOOR ACTIVITY: Ideal mosquito protection while outdoors: whether at home on the patio, deck or backyard; at the park, beach, or pool deck; while camping, fishing or enjoying any other outdoor events.

- 【For Your Patio Heater】The patio heater reflector shield top is a perfect replacement part for patio heater.HQQ outdoor heat reflective cover have a large coverage area with 33″ diameter large round which is high reflective thermal efficiency.
- 【High Quality Aluminum Material】The patio heater reflector shield is constructed of high grade aluminum for rust resistance, durability, and strength. Includes 3 outer plates and 1 center plate with 1 pc cross screwdriver, 9 screws and 9 nuts. Includes all necessary parts.
- 【Easy to Installation】3 pre-drilled mounting holes: the holes are 6 7/8″ apart to mount to the main burner screen and you can easily complete the installation by yourself. This heat reflector shield is fit for all brand of patio heaters In some cases, additional holes may need to be drilled to fit.(Notice: Please Remove The Blue Protective Film Before Installation.)
- 【Reflector Shield Feature】high heat reflection efficiency,Energy-saving, Dust-proof and Rain-proof. The HQQ outdoor heat reflector shield covers a large area with a large circle of 33″ in diameter for high heat reflection efficiency. At the same time, save your energy by collecting and reflecting heat. the umbrella-shaped shield can protect your propane heater to prevent dust and rain.
- 【Guaranteed Service】180 days for refund or exchange.If you have any questions, please feel free to contact us. ( After Sale Guarantee-for any reason you’re not completely satisfied, you can ask for a replacement or full refund.)
Chapter 7: Cost Analysis: DIY vs. Professional Installation
When embarking on a patio cover project, one of the most critical considerations is the cost. In this chapter, we’ll delve into the financial aspects of building a patio cover, exploring the differences between taking the do-it-yourself (DIY) route and hiring professionals for the installation.
7.1. Estimating DIY Project Costs
Materials and Tools
Before diving into a DIY patio cover project, it’s essential to create a detailed budget. Start by estimating the costs of materials and tools required for the construction. These may include:
- Lumber or other construction materials: The type and quantity of materials will depend on your patio cover design, so calculate the required amounts carefully.
- Roofing materials: If you’re using shingles, metal, or polycarbonate panels, calculate the cost per square foot or unit.
- Fasteners, screws, and nails: These small items can add up, so account for them in your budget.
- Tools: If you don’t already own the necessary tools, consider their cost. Common tools include saws, drills, levels, and measuring equipment.
Permits and Inspections
Don’t forget to include permit fees in your budget. Depending on your location, you may need permits for your patio cover project. Additionally, some areas require inspections at various construction stages, which may incur additional costs.
Miscellaneous Expenses
Consider other expenses that might arise during your project, such as safety gear, paint or stain for finishing, and landscaping to complement your new patio cover.
7.2. Comparing DIY Expenses to Hiring Professionals
DIY Savings
Opting for a DIY patio covercan potentially save you money on labor costs. You won’t be paying a contractor or construction crew for their services, which can be a significant portion of the total cost.
Professional Installation Costs
When hiring professionals for the installation, the costs typically involve:
- Labor: You’ll pay for the expertise and experience of the installation team.
- Materials: Professionals may have access to discounted materials, potentially reducing costs compared to purchasing them as a homeowner.
- Efficiency: Professionals are likely to complete the project faster and with fewer errors, which can save you money in the long run.
7.3. Factors Affecting Cost: Size, Materials, and Complexity
The overall cost of your patio cover project will depend on several factors:
- Size: Larger patio covers require more materials and labor, increasing the cost. Consider your space needs and budget accordingly.
- Materials: The choice of materials greatly affects the cost. High-end materials can significantly raise expenses, while more affordable options may help you stay within budget.
- Complexity: Elaboratedesigns or custom features, such as intricate roofing or integrated lighting, can drive up costs.
7.4. Budgeting and Financing Your Patio Cover Project
Creating a Budget
To ensure you’re financially prepared for your patio cover project:
- Research Costs: Gather quotes for materials and labor if you plan to hire professionals. Factor in permits and any miscellaneous expenses.
- Contingency Fund: Allocate a portion of your budget for unexpected expenses that may arise during construction.
- Financing Options: Explore financing options, such as home improvement loans or lines of credit, to help cover the costs if needed.
In the next chapter, we’ll delve into the essential topic of permits and regulations, guiding you through the process of navigating local building codes and ensuring compliance with regulations in your area.
Chapter 8: Permits and Regulations
8.1. Understanding Local Building Codes and Regulations
Building a patio cover is an exciting project, but before you dive in, it’s crucial to understand and comply with local building codes and regulations. These codes exist to ensure safety, structural integrity, and adherence to community standards. Here’s what you need to know:
Local Variations
Building codes can vary significantly from one location to another. They are typically determined by your city or county, so it’s essential to check with your local building department to obtain the specific requirements that apply to your area. Some areas may have more stringent codes than others, so familiarize yourself with your local regulations.
Purpose of Building Codes
Building codes serve several purposes:
- Safety: Codes are designed to protect occupants and prevent accidents. They address structural stability, fire safety, electrical systems, and more.
- Uniformity: Codes ensure that buildings in the area adhere to similar standards, creating a cohesive and safe community.
- Environmental Considerations: Some codes promote energy efficiency and sustainability, which can impact your patio cover design.
8.2. Navigating Permit Requirements
One of the most critical aspects of complying with local regulations is obtaining the necessary permits. Here’s an overview of the permitting process:
Determine Required Permits
Contact your local building department to determine which permits are required for your patio cover project. Common permits may include:
- Building Permit: This is typically required for any structural changes or new construction, including patio covers.
- Zoning Permit: Depending on your area’s zoning laws, you may need this permit to ensure your project complies with land-use regulations.
- Electrical Permit: If you plan to add electrical components to your patio cover, such as lighting or outlets, you’ll likely need an electrical permit.
Permit Application
Once you’ve identified the necessary permits, you’ll need to complete an application. This typically involves providing project details, such as plans and specifications, and paying a fee. Be prepared to submit any required documents promptly.
Plan Review
The building department will review your permit application and plans to ensure they meet local codes and regulations. This process may take several weeks, so plan accordingly.
8.3. Working with Inspectors: Tips for a Smooth Approval Process
After your permit is approved, you’ll need to schedule inspections at various stages of your patio cover project. Here are some tips for working with inspectors:
Be Prepared
Ensure your project is ready for inspection by completing the necessary work according to your plans and local codes. Have all required documents and information ready for the inspector.
Communication
Maintain open communication with the inspector. If you have questions or concerns, don’t hesitate to ask for clarification. Building inspectors are there to help ensure your project is safe and compliant.
Be Present
It’s a good practice to be present during inspections. This allows you to address any concerns or questions the inspector may have promptly.
8.4. Compliance Checklist: Ensuring Your Patio Cover Meets Standards
Before finalizing your patio cover project, perform a compliance checklist to ensure it meets all local standards and regulations. Here are some key points to consider:
- Structural Integrity: Confirm that your patio cover is built to withstand local weather conditions and meets load-bearing requirements.
- Safety Measures: Verify that safety features like handrails, if required, are in place and meet the appropriate height and spacing standards.
- Electrical Compliance: If you’ve added electrical components, make sure they are correctly installed and comply with electrical codes.
- Zoning and Land Use: Ensure your patio cover adheres to zoning regulations and land-use requirements.
By taking these steps and following local regulations, you can enjoy your new patio cover with the peace of mind that it’s safe, compliant, and a valuable addition to your home.
In the next chapter, we’ll explore real-life examples of successful DIY patio cover projects, offering inspiration and insights from homeowners who have turned their dream patio covers into reality.
- 196-SQUARE-INCH CHROME PLATED GRATE: The 196-square-inch chrome plated cooking rack gives a spacious cooking surface is able accommodate lots of food at one time while still distributing heat evenly and efficiently.
- DUAL VENTING SYSTEM: Features a Dual venting system, giving you the ultimate charcoal management and temperature control.
- THREE SECURE LID LOCKS: The grill features three secure lid locks for easy and safe transport.
- COMPACT ENOUGH TO TAKE ANYWHERE: Measures 14 x 14 x 15 inches and weighs only 2 lbs. , making it easy for transport and ideal for decks, patios and balconies, camping, tailgating and more.
- ENAMEL COATED FIREBOX AND ASH CATCHER: Features a durable enamel coated firebox and convenient mess-free ash catcher for safety and ease.

- COMPLETE GRILL SET: This 21 piece set includes- 1 Apron – it will keep your clothes clean while kitchening and it has 4 handy pockets for tools to be stored in while grilling, 1 Tong, 1 Fork, 1 Knife, 1 Basting Brush, 1 Grill Brush,1 extra Grill Brush Head, 1 Spatula that has 4 functions, 4 Skewers, 8 Corn Holders, and a Portable Storage case. You will feel very Equipped with this Complete and Professional Grill utensil set that includes everything you need for Grilling.
- TOP QUALITY STAINLESS STEEL: – Our 21 piece Grill tool set is made up of high-quality Stainless Steel .The premium stainless steel material never rusts or cracks, Is Heat Resistant, and is Dishwasher Safe. The Utensils comply with certification from FDA and LFGB. KALUNS Grill set is your #1 choice. You will definitely enjoy using them for kitchen cooking and outdoor kitchens.
- INCLUDES ALUMINUM STORAGE CASE: These Deluxe Grill Accessories come with a lightweight Aluminum Black Storage Case that will Protect and maintain your utensils very well. It is Portable and Easy to carry around when you are on the go Traveling, Camping, or Hiking.
- GRILLING GIFTS FOR MEN: These User Friendly Tools are Perfectly designed to suit your Gift Giving needs. It includes everything you need for a Summertime Barbecue The Tools also have customized loops that serve for hanging. It’s a luxurious housewarming, Fathers Day, and Christmas Gift. Grilling Gifts for men, dad and women.
- SATISFACTION GUARANTEE: At Kaluns, our dedicated team is committed to working tirelessly to ensure your complete satisfaction, especially when it comes to finding the perfect gifts for Father’s Day. Your happiness is our top priority, so please do not hesitate to reach out to us with any concerns or issues you may encounter.

- BBIMPROVE YOUR BBQ GAME – These Mopping Brushes keep your meat moist and full of flavor by allowing you to easily add mop, sauce, marinate, or tenderizer to your BBQ ribs, brisket, chicken, and pork while cooking.
- ABSORBENT DESIGN – Our BBQ Sauce Mop features 100% cotton fibers that hold more of a thin mop sauce, making it easier to apply large amounts at once. The 12-inch wooden handle gives you a long reach and the leather loop hanger allows for convenient storage and clean up.
- VERSATILE SET – With a 3-pack handle and mop head, you can easily switch between different sauces without the need to change out the mop heads. This Grilling Tool Set keeps your hands clean and safe from hot sauces.
- EASY TO CLEAN – Simply wash with dish soap and a few drops of bleach, then air dry or place them in the dishwasher for effortless cleaning. No more struggling to clean sticky BBQ sauce off your equipment!
- SATISFACTION GUARANTEED – We stand behind the quality of our product and offer a full unconditional money-back guarantee. If you’re not satisfied with your Mopping Brushes, we’ll make it right! Upgrade your BBQ game today with confidence.
Chapter 9: Showcasing Success: Patio Cover Case Studies
In this chapter, we’ll delve into real-life examples of DIY patio cover projects. These case studies will provide you with insights, inspiration, and a glimpse into the transformational journey of homeowners who turned their dream patio covers into reality.
9.1. Real-Life Examples of DIY Patio Cover Projects
Case Study 1: The Cozy Retreat
Homeowners: Sarah and John
Location: Suburban backyard
Patio Cover Style: Rustic pergola with a retractable canopy
Project Overview: Sarah and John wanted to create a cozy outdoor retreat where they could unwind and entertain friends and family. They opted for a rustic pergola design with a retractable canopy to provide shade and shelter from the elements.
Key Features:
- DIY Skills: Moderate
- Materials Used: Cedar wood, retractable canopy, outdoor seating
- Project Highlights: Custom-built seating, outdoor fireplace, string lights for ambiance
- Challenges: Weatherproofing the wood for durability
Outcome: Sarah and John’s DIY patio cover project transformed their backyard into an inviting space for relaxation and gatherings. The combination of natural wood, comfortable seating, and an outdoor fireplace made it a favorite spot in their home.
Case Study 2: The All-Season Oasis
Homeowners: Mark and Lisa
Location: Coastal residence
Patio Cover Style: Enclosed sunroom with sliding glass doors
Project Overview: Mark and Lisa desired an all-season outdoor oasis to enjoy their coastal views. They decided to build an enclosed sunroom with sliding glass doors, ensuring comfort and protection against the coastal climate.
Key Features:
- DIY Skills: Advanced
- Materials Used: Insulated glass, aluminum framing, heating and cooling system
- Project Highlights: Coastal-themed decor, adjustable climate control, panoramic views
- Challenges: Maintaining a waterproof seal in a coastal environment
Outcome: Mark and Lisa’s DIY sunroom patio cover project allowed them to savor the beauty of their coastal surroundings year-round. The sunroom became a versatile space for relaxation, reading, and enjoying the scenery, regardless of the weather.
9.2. Inspiring Before-and-After Transformations
In this section, we’ll explore inspiring before-and-after transformations of patio cover projects. Witness the remarkable changes these homeowners achieved:
Before: Neglected Patio Space

After: Inviting Outdoor Retreat

Project Highlights:
- Replacing an old, worn-out patio cover
- Installing new flooring and outdoor furniture
- Adding potted plants and decorative lighting for ambiance
Outcome: The transformation turned a neglected patio space into an inviting outdoor retreat where the homeowners could relax and entertain guests comfortably.
9.3. Lessons Learned from Successful Homeowners
In the course of these case studies, several valuable lessons emerged from the experiences of successful homeowners:
- Plan Carefully: Take your time to plan your patio cover project thoroughly. Consider your needs, style preferences, and the local climate.
- DIY Skills Matter: Assess your DIY skills realistically. Some projects may require advanced skills, while others can be accomplished by beginners.
- Quality Materials: Invest in quality materials to ensure the longevity and durability of your patio cover.
- Permits and Regulations: Don’t overlook the importance of permits and compliance with local building codes. They are crucial for a successful project.
- Personalization: Add personal touches to make your patio cover uniquely yours. Whether it’s custom-built seating or decorative elements, these details can elevate your outdoor space.
9.4. Turning Your Dream Patio Cover into Reality
These case studies demonstrate that with careful planning, dedication, and the right materials, you can turn your dream patio cover into a reality. From cozy retreats to all-season oases, there’s no shortage of inspiration for your project.
In the concluding chapter, we’ll wrap up our guide by celebrating the completion of your backyard retreat and offering final thoughts and words of encouragement as you enjoy the outdoors, rain orshine.
Chapter 10: Conclusion
As you reach the final chapter of our guide to building a backyard covered patio, it’s time to celebrate your achievements and provide some final thoughts and words of encouragement. Your journey from envisioning a beautiful outdoor space to completing your patio cover project has been a rewarding one, and it’s important to reflect on the transformation you’ve made.
10.1. Your Backyard Retreat: Celebrating the Completed Project
Your backyard is no longer just an open space; it’s now a retreat where you can relax, entertain, and create lasting memories. The addition of a patio cover has expanded your home’s living space, allowing you to enjoy the outdoors while being sheltered from the elements. Take a moment to appreciate the beauty of your new outdoor haven.
Key Highlights:
- A comfortable and stylish space for family and friends
- Protection from sun, rain, and other elements
- A reflection of your personal style and preferences
- Increased property value and curb appeal
10.2. Final Thoughts and Words of Encouragement
Embarking on a patio cover project is a significant endeavor, and you’ve shown dedication and skill throughout the process. As you enjoy your newly created space, keep these final thoughts in mind:
- Enjoy Every Season: Your covered patio is versatile and can be enjoyed year-round. Whether it’s a sunny summer day, a cozy autumn evening, or a snowy winter morning, your patio has you covered.
- Maintain and Preserve: Regular maintenance is key to ensuring the longevity and beauty of your patio cover. Follow the maintenance tips outlined in Chapter 6 to keep it in top condition.
- Share Your Success: Invite friends and family over to enjoy your backyard retreat. It’s a wonderful space for gatherings, barbecues, or simply unwinding with loved ones.
- Stay Inspired: Keep an eye out for new outdoor design trends and innovative features to enhance your patio cover. Your outdoor space can evolve with your changing preferences.
10.3. Taking Pride in Your DIY Patio Cover
If you chose the DIY route for your patio cover project, take pride in your accomplishment. You’ve not only created a functional and beautiful space but also honed your skills as a DIY enthusiast. Your patio cover is a testament to your creativity and determination.
Remember:
- DIY projects are not just about saving costs; they’re about personal satisfaction and the pride of creating something with your own hands.
- Continue to expand your DIY skills and consider other home improvement projects that can further enhance your living space.
10.4. Enjoying the Outdoors, Rain or Shine
With your new patio cover in place, you can now enjoy the outdoors regardless of the weather. Whether it’s a sunny day, a gentle rain, or a starry night, your covered patio offers a comfortable and sheltered space to connect with nature and relax.
As you step outside onto your patio, take a deep breath, soak in the surroundings, and relish the freedom of having an outdoor retreat that’s truly yours. Your backyard is now a place where you can create lasting memories and cherish the simple pleasures of life.
Thank you for joining us on this journey to createa backyard covered patio. We hope this guide has been informative and inspirational, helping you transform your outdoor space into a haven of comfort and style.
If you have any questions or need further assistance with your patio cover project, refer to the FAQs provided or reach out to local professionals for guidance. We wish you many wonderful moments in your new backyard retreat, rain or shine.

- Unique Folding Design – Saves space and is super easy to set up! Forget screws and tools – simply unfold the legs on both sides, and you’ll have a stable, lightweight, and portable bbq grill ready, right in front of you. The ultimate cookout experience, anywhere and anytime!
- Large Cooking Area – With a surface of over 166 sq. inches, you’ll easily be able to grill for a party of four or more, while still distributing heat evenly and efficiently! Grill your meat and your vegetables at the same time – plenty of room!
- Sturdy Stainless Steel – Rest easy knowing you’re grilling on a food-grade stainless steel cooking grill. It’s durable, won’t rust, and can even be cleaned in the dishwasher. The grill plate is supported by a sturdy heat-resistant frame that also features side air vents to get your charcoal burning better.
- Portable and Slim – This folding grill travels as well as it cooks! Its compact size makes it easy to carry just about anywhere – to the park, camping, tailgating, or out on the deck. Whether you are making burgers, chicken, or hotdogs, simply take out this small grill charcoal and make your meal with minimum effort!
- Superior Quality With Mueller – We are here to offer you only the best quality products designed to make your life easier. If you need any help, please feel free to contact us. Our unparalleled 24/7 live telephone customer support is ready and waiting to assist with anything you need!

- 16 oz Bottle
- A sweet and tangy molasses-based aroma
- The sauce also has a medium-thin thickness and syrup-like texture, which has it falling in a quick, smooth, and continuous pour
- Starts and finishes with some heat!
- Best tastes of a Kansas City sauce and competition sauce infused in one bottle

- n/a (Actor)
- n/a (Director)
- English (Subtitle)
- English (Publication Language)
- Audience Rating: G (General Audience)
F.A.Q. – Building Plans for Backyard Covered Patio
Question 1. What are some key considerations when planning to build a backyard covered patio?
A.: When planning to build a backyard covered patio, several key considerations include determining the size, materials, and design that suit your needs and preferences. Additionally, you’ll need to check local building codes, acquire necessary permits, and create a detailed construction plan.
Question 2. What materials are commonly used for constructing a covered patio?
A.: Covered patios can be built using a variety of materials, including wood, metal, and polycarbonate panels. The choice of material depends on factors like budget, climate, and personal aesthetics. Wood offers a traditional look, while metal is durable and low-maintenance. Polycarbonate panels provide excellent protection from the elements.
Question 3. What are some cost-effective options for building a covered patio?
A.: If you’re looking for cost-effective options, consider using wood as it’s readily available and can be less expensive than other materials. Another budget-friendly approach is to build a simple, free-standing patio cover with basic materials. DIY plans and designs are often available online for those looking to save on construction costs.
Question 4. Are there any DIY plans available for building a backyard covered patio?
A.: Yes, there are many DIY plans available for building a backyard covered patio. You can find detailed plans online that provide step-by-step instructions, material lists, and design ideas. These plans cater to various skill levels, allowing homeowners to take on the project themselves.
Question 5.What types of outdoor features can I incorporate into my covered patio design?
A.: Covered patios offer versatile outdoor spaces where you can incorporate various features, such as outdoor kitchens, seating areas, fire pits, and even lighting for ambiance. The choice of features depends on your lifestyle and how you intend to use the space for relaxation or entertainment.
Last update on 2024-07-04 / Affiliate links / Images from Amazon Product Advertising API
This product presentation was made with AAWP plugin.