Hair is often referred to as the ‘crowning glory,’ and for a good reason. Healthy, shiny hair can boost confidence and enhance one’s overall appearance. However, frequent salon visits can be time-consuming and expensive. Enter the world of best home use hair treatment. With the right knowledge and ingredients, you can achieve salon-like results in the comfort of your home.
Introducing DIY Hair Treatments for Healthy Hair
Welcome to the world of DIY hair treatments, where the power of nature meets your hair’s needs. In this chapter, we delve into the realm of homemade solutions that will transform your hair health. Whether you’re battling dryness, seeking vibrant color, or simply looking to add volume, these natural remedies have you covered. Let’s explore the benefits of opting for DIY hair treatments and discover the secrets behind achieving lustrous locks without breaking the bank.
The Benefits of Best Home Use Hair Treatments
Embarking on a journey of DIY hair treatments unlocks a host of advantages that extend beyond your hair’s surface. Unlike store-bought products laden with chemicals, homemade remedies harness the purity of natural ingredients. You gain control over what goes into your hair, minimizing exposure to harsh additives that can strip your strands of vitality. By using items readily available in your kitchen, you not only save money but also contribute to sustainable living by reducing packaging waste.
Understanding Common Hair Concerns
Before we delve into specific remedies, it’s crucial to identify the hair concerns that plague many of us. Whether you’re grappling with thinning hair, dryness, frizz, or dullness, these homemade treatments are tailored to address your unique needs. Understanding the root causes of these issues allows us to curate treatments that provide effective solutions, unlocking the potential for radiant and healthy hair.
Exploring Natural Ingredients for Hair Care
Nature’s pantry boasts a treasure trove of ingredients that are not only nourishing but also incredibly effective in treating various hair woes. From coconut oil’s moisturizing prowess to the soothing properties of tea tree oil, we’ll uncover the magic behind each component. Our journey will take us through the world of eggs, bananas, honey, and more, showcasing their potential to transform your hair from lackluster to luminous.
Whether you’re seeking to fortify brittle hair, tame frizz, or revive color, the chapters ahead will guide you through the intricacies of each DIY hair treatment. So, get ready to embrace a natural approach to hair care that not only revitalizes your locks but also empowers you to take charge of your hair’s well-being.
Tackling Thinning Hair and Hair Loss
Thinning hair and hair loss can be distressing, impacting not just your appearance but also your confidence. In this chapter, we’ll delve into the world of hair loss and explore the crucial role that protein-rich treatments play in addressing these concerns. Learn about a potent DIY remedy that combines the power of bananas and eggs to restore hair’s strength and volume, paving the way for a healthier mane.
Understanding Thinning Hair and Hair Loss
Thinning hair and hair loss can result from a variety of factors, including genetics, hormonal changes, stress, and poor hair care practices. Identifying the underlying cause is essential for devising effective solutions. While there’s no one-size-fits-all answer, a comprehensive approach that focuses on nourishing and strengthening the hair follicles can make a significant difference.
The Importance of Protein-Rich Treatments
Proteins are the building blocks of hair, providing structure and strength. Incorporating protein-rich treatments into your hair care routine can help fortify weak and thinning strands. These treatments work by replenishing the protein content in your hair, enhancing its resilience and minimizing breakage. By delivering essential amino acids, protein-rich treatments promote hair growth and volume.
Creating a Banana Protein Smoothie Hair Mask
Ingredients:
- 2 egg yolks
- 2 ripe bananas
- 2 to 3 tablespoons of honey
- 1/2 cup of conditioner
- 2 tablespoons of olive oil
Instructions:
- In a blender, combine the egg yolks, ripe bananas, honey, conditioner, and olive oil.
- Blend until you achieve a smooth and consistent mixture.
- The resulting mixture should be thick and creamy, rich in proteins and nutrients.
Step-by-Step Guide: Applying the Banana Protein Smoothie Mask
- Start with damp, clean hair.
- Divide your hair into sections for easier application.
- Apply the banana protein smoothie mixture generously from roots to ends, ensuring complete coverage.
- Gently massage the mask into your scalp to stimulate circulation and encourage nutrient absorption.
- Once applied, cover your hair with a shower cap to create a warm environment that facilitates penetration.
- Leave the mask on for 20 to 30 minutes, allowing the proteins and nutrients to work their magic.
- After the designated time, rinse your hair thoroughly with cool water to seal the cuticles and lock in the benefits.
- You can then proceed with your regular shampoo and conditioning routine.
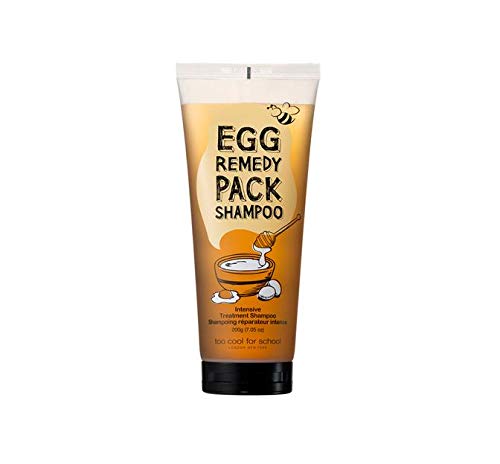
Alternative Store-Bought Options for Thinning Hair
While DIY treatments can be highly effective, if you prefer a ready-made solution, there are quality store-bought options available as well. Look for products that boast protein-rich formulas designed to strengthen and nourish your hair. .
Hair Bonding Treatments: These treatments work to repair and undo damage caused by coloring, heat styling, or environmental factors. They come in various forms such as shampoos, deep conditioners, hair masks, and leave-in treatments
As you embark on the journey to combat thinning hair and hair loss, remember that consistency is key. Incorporating protein-rich treatments like the banana protein smoothie hair mask into your routine can lead to visible improvements over time. By nourishing your hair from within, you’re taking a proactive step towards healthier, fuller locks.
Strengthening Brittle Hair
Brittle hair can often feel like a constant battle against breakage and lackluster appearance. In this chapter, we’ll delve into the world of brittle hair and explore the transformative potential of egg yolks as a potent hair-strengthening ingredient. Discover how to create and apply an egg yolk hair treatment that can infuse your locks with renewed vitality and resilience.
Dealing with Brittle Hair and Increased Breakage
Brittle hair is characterized by its fragile nature, often leading to increased breakage, split ends, and an overall lack of luster. Common causes include excessive heat styling, chemical treatments, and environmental factors that strip away the hair’s natural moisture and protective layers. Addressing brittle hair requires a comprehensive approach that nourishes and strengthens the hair shaft from within.
The Power of Egg Yolks for Hair Strengthening
Egg yolks are rich in proteins, biotin, vitamins, and essential fatty acids, making them a powerhouse ingredient for strengthening and nourishing hair. Proteins in egg yolks help repair damaged strands and minimize breakage, while biotin supports hair growth and overall hair health. The combination of nutrients in egg yolks provides a holistic solution for restoring hair’s resilience and vitality.
Preparing and Applying an Egg Yolk Hair Treatment
Ingredients:
- 2 egg yolks
- 2 tablespoons of olive oil
- 1 tablespoon of honey
Instructions:
- In a bowl, whisk the egg yolks until they are well combined.
- Add olive oil and honey to the egg yolks and mix thoroughly to create a smooth mixture.
- The resulting mixture should be creamy and consistent, ready for application.
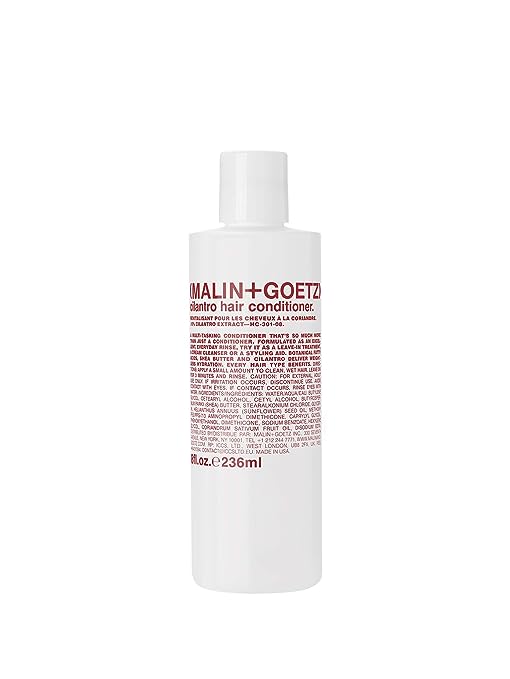
Using Store-Bought Remedies for Brittle Hair
While DIY treatments can be highly effective, convenient store-bought solutions can also help combat brittle hair. Look for products that focus on repairing and strengthening the hair’s structure.
By incorporating egg yolk-based treatments into your hair care routine, you’re providing your hair with the essential nutrients it needs to regain its strength and vitality. Remember that consistency is key, and over time, your efforts will be reflected in hair that is noticeably stronger, smoother, and more resilient.
Enhancing Curls and Waves
Embracing your natural curls and waves is a journey towards celebrating your unique hair texture. In this chapter, we’ll explore how you can enhance your curls and waves using a homemade curl enhancer crafted from the delightful combination of molasses and honey. Discover the secrets to defining and amplifying your curls, giving your hair a vibrant and dynamic appearance.
Embracing Natural Waves and Curls
Natural waves and curls are a beautiful expression of your hair’s inherent texture. However, they can sometimes lack definition and fall flat due to factors like humidity and styling techniques. Enhancing your curls and waves doesn’t mean fighting against their nature, but rather working with them to achieve a stunning and voluminous look.
Homemade Curl Enhancer with Molasses and Honey
Molasses and honey, two kitchen staples, come together to create a powerful curl-enhancing treatment. Molasses is rich in minerals like iron and magnesium that promote hair health and shine. Honey, a natural humectant, helps retain moisture in the hair, preventing frizz and encouraging curl formation. When combined, these ingredients form a potent concoction that encourages your hair’s natural curl pattern.
Crafting the Molasses and Honey Curl Enhancer
Ingredients:
- 2 tablespoons of molasses
- 1 tablespoon of honey
Instructions:
- In a bowl, combine the molasses and honey.
- Mix well until the two ingredients are thoroughly blended.
Store-Bought Alternatives for Defined Curls and Waves
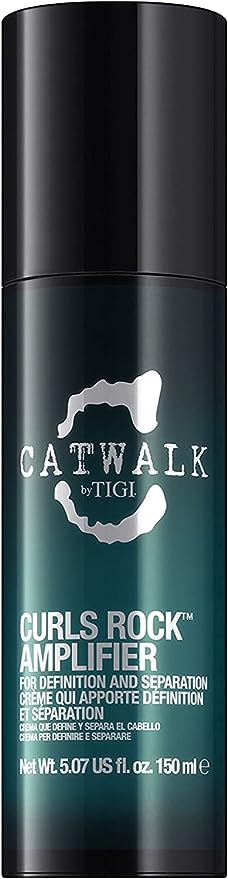
For those seeking convenience, there are also store-bought alternatives to enhance curls and waves. These products offer a quick and effective solution for achieving stunning curls on the go.
Enhancing your curls and waves is about embracing your natural beauty and enhancing what you already have. By utilizing the molasses and honey curl enhancer or opting for trusted store-bought products, you can enjoy vibrant and defined curls that make a lasting impression.
Moisturizing Dry and Damaged Hair
In the quest for healthy and luscious locks, one of the primary concerns is addressing dryness, split ends, and breakage. Dry and damaged hair not only looks dull but can also feel brittle and prone to further damage. In this chapter, we will delve into the role of coconut oil in hair moisturization and explore how you can create an intensive overnight coconut oil treatment to revive your hair’s natural beauty.
Addressing Dryness, Split Ends, and Breakage
Dry and damaged hair is often the result of a combination of factors, including exposure to environmental stressors, overstyling, and a lack of proper care. The hair’s natural oils play a crucial role in maintaining its moisture and integrity. When these oils are stripped away or depleted, the hair becomes vulnerable to dryness, split ends, and breakage. Restoring moisture and nourishment is essential to regain hair health.
The Role of Coconut Oil in Hair Moisturization
Coconut oil has been celebrated for its exceptional moisturizing properties. Rich in fatty acids and vitamins, coconut oil penetrates the hair shaft to deliver deep hydration. It also forms a protective barrier that helps retain moisture, preventing further water loss. This natural elixir is particularly effective for replenishing dry and damaged hair, leaving it soft, shiny, and more manageable.
Creating an Intensive Overnight Coconut Oil Treatment
Ingredients:
- 2 tablespoons of virgin coconut oil
Instructions:
- Gently warm the coconut oil to make it liquid but not hot.
- Part your hair into sections for even application.
- Using your fingertips, massage the warm coconut oil into your scalp, working it through the lengths of your hair.
- Once applied, cover your hair with a shower cap or towel to trap heat and enhance absorption.
- Leave the treatment on overnight for an intensive moisturizing experience.
- In the morning, shampoo and condition your hair as usual to remove the oil.
Considering Different Oils for Hair Moisturization
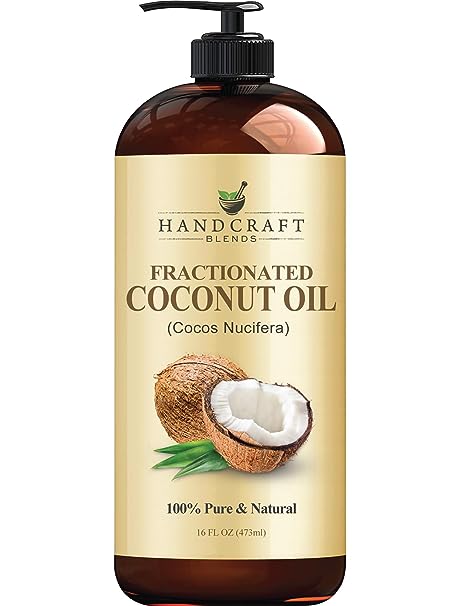
While coconut oil is a popular choice for hair moisturization, there are other natural oils that can provide similar benefits. Argan oil, jojoba oil, and avocado oil are rich in nutrients that promote hydration, shine, and manageability. Experimenting with different oils can help you find the best match for your hair’s unique needs.
Reviving dry and damaged hair requires a combination of moisture, nourishment, and protection. Incorporating an intensive overnight coconut oil treatment into your routine can help you reclaim the luster and health of your locks. Remember that consistent care, using quality natural ingredients, is the key to achieving vibrant and resilient hair.
DIY Natural Hair Treatments: These treatments can be made at home using ingredients like rosemary oil, homemade deep conditioner, rice water, yogurt, olive oil, and coconut oil. They offer a natural alternative to commercial hair products and can help with various hair concerns2
Soothing an Itchy Scalp
The discomfort of an itchy scalp can be both frustrating and embarrassing, often leading to scratching that exacerbates the issue. In this chapter, we will explore the underlying causes of an itchy scalp and how tea tree oil, known for its soothing and moisturizing properties, can be used as an effective DIY treatment. Additionally, we’ll discuss the benefits of scalp conditioners and how they can provide relief from scalp discomfort.
Exploring the Causes of an Itchy Scalp
An itchy scalp can stem from a variety of factors, including dryness, excessive oil production, product buildup, and skin conditions like dandruff or psoriasis. Understanding the root cause is essential in finding the appropriate solution. An itchy scalp can also be a result of environmental factors, such as harsh weather or exposure to allergens.
Tea Tree Oil for Scalp Soothing and Moisturization
Tea tree oil, derived from the leaves of the tea tree (Melaleuca alternifolia), has gained popularity for its antimicrobial, anti-inflammatory, and moisturizing properties. These qualities make it an excellent choice for addressing scalp issues. Tea tree oil helps to soothe irritation, reduce redness, and alleviate itching by promoting a healthy balance of the scalp’s natural oils.
Making a DIY Tea Tree Oil Scalp Treatment
Ingredients:
- 2-3 drops of tea tree oil
- 1 tablespoon of carrier oil (such as coconut oil or jojoba oil)
Instructions:
- Mix the tea tree oil and carrier oil in a small bowl.
- Part your hair to expose your scalp and apply the mixture using a cotton ball or your fingertips.
- Gently massage the oil mixture into your scalp using circular motions.
- Leave the treatment on for at least 30 minutes to an hour.
- Shampoo and condition your hair as usual to remove the oil.
Using Scalp Conditioners for Itchy Scalp Relief
Scalp conditioners are specially formulated products designed to provide relief to a sensitive and itchy scalp. They often contain ingredients like aloe vera, chamomile, and menthol, which offer cooling and soothing sensations. When choosing a scalp conditioner, opt for products with natural ingredients and avoid those with harsh chemicals that could exacerbate the problem.
Maintaining scalp health is crucial for overall hair well-being. Incorporating tea tree oil treatments and scalp conditioners into your routine can help alleviate itchiness, promote a balanced scalp environment, and contribute to the health and vitality of your hair.
Boosting Volume for Limp Hair
Struggling with flat and lifeless hair can leave you feeling less confident and dissatisfied with your overall appearance. In this chapter, we will delve into effective methods to tackle the challenge of limp hair and explore how laundry starch, an unexpected yet powerful ingredient, can be harnessed to add volume and texture to your hair. Whether you have fine or thin hair, these techniques are designed to give your locks the lift they deserve.
Dealing with Flat and Limp Hair
Flat hair is often caused by factors like genetics, humidity, overuse of heavy styling products, or even an unhealthy scalp. The lack of volume can make hair appear thin and lifeless, reducing its vibrancy and manageability. Fortunately, there are solutions that can help you achieve fuller, bouncier hair that exudes vitality.
Laundry Starch for Volume and Texture
You might be surprised to learn that laundry starch, a common household product used for ironing clothes, can also work wonders on your hair. Its ability to add volume and grip makes it an ideal candidate for boosting the appearance of limp hair. When used correctly, laundry starch can lift your roots and create the illusion of thicker, more voluminous hair.
Application Tips for Using Starch on Hair
Using laundry starch on your hair requires some care and technique to avoid creating a sticky mess. Here’s how to effectively apply laundry starch for volume and texture:
Steps:
- Choose a Starch Spray: Opt for a starch spray that is specifically designed for fabrics and safe for use on hair. Avoid using traditional liquid starch, as it can be too heavy and difficult to apply evenly.
- Prep Your Hair: Start with clean, dry hair. Ensure your hair is detangled and free from any product residue.
- Section Your Hair: Divide your hair into manageable sections using clips or hair ties. This will allow you to apply the starch evenly.
- Apply the Starch: Hold the starch spray about 6-8 inches away from your hair and lightly mist the roots and mid-lengths of each section. Be cautious not to oversaturate your hair.
- Massage and Scrunch: After applying the starch, gently massage your scalp to distribute the product and create lift. Use your fingers to scrunch and tousle your hair for added texture.
- Blow-Dry: Use a blow dryer on low heat and medium speed to activate the starch and set the volume. Use your fingers to lift your roots as you blow-dry.
Store-Bought Products for Hair Volume
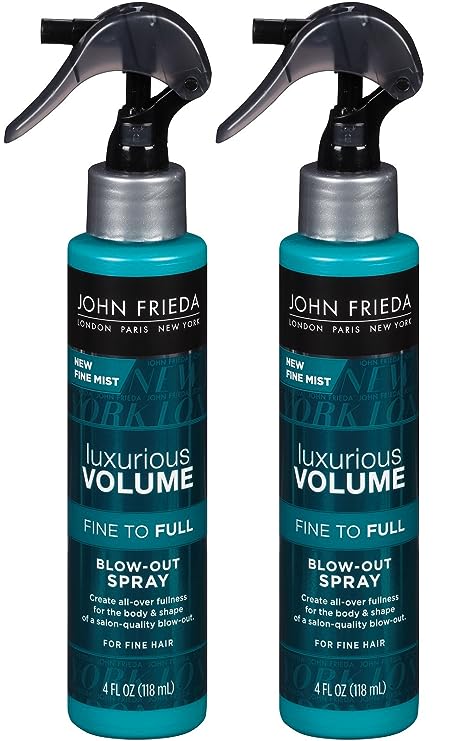
While laundry starch can be a surprisingly effective option for boosting volume, there are also various store-bought hair products designed to provide lift and texture. Look for volumizing sprays, mousses, and dry shampoos that are formulated to add body without weighing your hair down.
Achieving voluminous hair is within reach, even for those with naturally limp locks. By incorporating laundry starch or specialized volumizing products into your routine, you can enjoy fuller and more voluminous hair that commands attention and leaves you feeling confident.
Enhancing Hair Color and Shine
Vibrant and glossy hair is often associated with health and vitality. In this chapter, we’ll explore strategies for enhancing the natural color and shine of your hair using a range of natural ingredients. From intensifying your hair’s hue to achieving a stunning reflective sheen, these methods can help you achieve hair that truly captivates.
Strategies for Vibrant and Shiny Hair
Achieving hair that radiates vibrancy and shine requires a combination of care, nourishment, and attention to detail. Here are some strategies to consider:
- Balanced Diet: A diet rich in vitamins, minerals, and protein contributes to the overall health of your hair, enhancing its natural luster.
- Proper Hydration: Staying well-hydrated helps maintain the moisture balance of your hair, preventing it from appearing dull and lackluster.
- Gentle Hair Care: Avoid excessive heat styling, harsh chemicals, and over-washing, as they can strip your hair of its natural oils and shine.
Using Natural Ingredients to Intensify Hair Color
If you’re looking to enhance your hair color naturally, there are a variety of ingredients that can help emphasize your hair’s hue. Here are a few options:
- Chamomile: Chamomile tea or chamomile-infused water can gently lighten blonde hair and bring out its golden tones.
- Henna: Henna is a plant-based dye that can add reddish hues to your hair. It’s a great option for those looking for a temporary color boost.
- Black Tea: For darker hair colors, black tea can help deepen and enrich the color, creating a more lustrous appearance.
DIY Rinses for Different Hair Color Effects
DIY hair rinses can offer subtle shifts in hair color that enhance shine and dimension. Here’s how to create and use them:
Chamomile Rinse for Blondes:
- Brew a strong cup of chamomile tea and let it cool.
- After shampooing, pour the chamomile tea over your hair as a final rinse.
- Leave it on for a few minutes before rinsing with cool water.
Black Tea Rinse for Brunettes:
- Brew a cup of strong black tea and let it cool.
- After washing your hair, pour the black tea over your hair as a final rinse.
- Allow it to sit for a few minutes before rinsing with cool water.
Considering Color Enhancing Shampoos
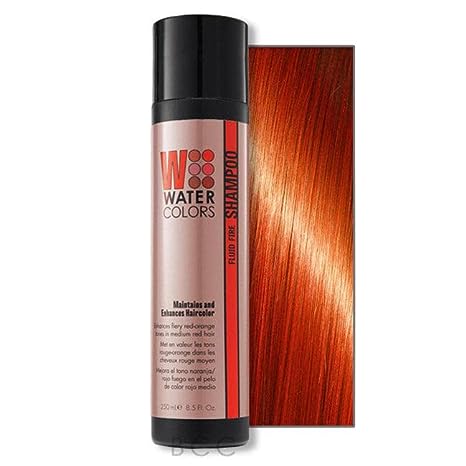
If you’re looking for a convenient way to enhance your hair color and shine, consider using color-enhancing shampoos. These shampoos are formulated to deposit small amounts of color onto your hair with each use, gradually intensifying and enriching your natural hue.
When using color-enhancing shampoos, follow these tips:
- Choose a shampoo that matches your hair color or the color effect you’re aiming for (e.g., blonde, brunette, red).
- Use the shampoo once or twice a week to avoid over-depositing color and maintain a natural look.
- Follow up with a color-protecting conditioner to keep your hair moisturized and vibrant.
By incorporating these strategies and ingredients into your hair care routine, you can achieve hair that not only showcases rich color but also shines with health and vitality.
At-Home Keratin Treatments: These treatments help to smooth and repair the hair by replenishing keratin, a protein that strengthens and protects the hair. They come in different forms such as kits, leave-in treatments, and masks3
Combatting Dullness and Lack of Shine
A radiant shine is a hallmark of healthy hair, but factors like pollution, excessive styling, and product buildup can lead to dull and lackluster locks. In this chapter, we’ll delve into the importance of cuticle health in achieving luminous hair and explore how an apple cider vinegar rinse can be a game-changer for restoring brilliance.
Understanding Cuticles and Hair Shine
The outer layer of your hair, known as the cuticle, plays a crucial role in determining how light interacts with your hair strands. When the cuticles lie flat and smooth, they reflect light, creating a glossy appearance. However, cuticle damage can lead to rough surfaces that scatter light, resulting in a dull and lack of shine.
Apple Cider Vinegar Rinse for Cuticle Smoothing
Apple cider vinegar (ACV) is a natural remedy that has gained popularity in the hair care community for its ability to restore cuticle health and enhance shine. The acidity of ACV helps to:
- Remove Buildup: ACV acts as a gentle clarifying agent, dissolving product residue and impurities that can make hair appear dull.
- Balance pH: A balanced pH level is essential for cuticle health. ACV helps to maintain the optimal pH of your hair, preventing cuticle damage.
- Seal Cuticles: ACV helps flatten and seal the cuticles, promoting light reflection and a smoother appearance.
Step-by-Step Guide to Using Apple Cider Vinegar Rinse
Follow these steps to create and apply an apple cider vinegar rinse for enhanced hair shine:
- Dilute ACV: Mix 1 part ACV with 2-3 parts water. You can adjust the ratio based on your hair’s needs and sensitivity.
- Shampoo: Start by shampooing your hair as usual to remove dirt and oil.
- Apply the Rinse: Pour the diluted ACV mixture over your hair, focusing on the lengths and ends. Avoid getting the solution in your eyes.
- Massage and Wait: Gently massage the mixture into your scalp and hair for a minute or two. Allow the mixture to sit on your hair for about 3-5 minutes.
- Rinse: Thoroughly rinse your hair with cool water to remove the vinegar scent. The scent will fade as your hair dries.
- Condition: You can follow up with a conditioner to ensure your hair remains smooth and manageable.
Store-Bought Solutions for Hair Shine
If you’re looking for convenient alternatives to DIY treatments, there are several store-bought products designed to boost hair shine. These may include:
- Shine Serums: These lightweight serums can be applied to damp or dry hair to add an instant dose of shine.
- Silicone-Based Products: Silicone-based sprays and creams can coat the hair strands, creating a reflective surface and reducing frizz.
- Shine-Enhancing Shampoos and Conditioners: Formulated with light-reflecting ingredients, these products can help enhance the natural shine of your hair.
By incorporating an apple cider vinegar rinse into your hair care routine and exploring suitable store-bought solutions, you can effectively combat dullness and lack of shine, revealing hair that radiates health and brilliance.
Taming Frizz, Fly Aways, and Wisps
Unruly frizz, flyaways, and pesky wisps can quickly sabotage your carefully styled hair. In this chapter, we’ll explore effective methods for addressing and taming these common hair frustrations. Discover how castor oil, a natural elixir, can work wonders in smoothing and protecting your hair from thermal damage.
Addressing Frizz and Fly Aways
Frizz occurs when the outer layer of your hair cuticle lifts due to humidity, causing the hair to appear frayed and unruly. Flyaways and wisps are those short, stray hairs that seem to have a mind of their own. These hair woes can be triggered by various factors, including:
- Humidity: Moisture in the air can cause the hair to swell and frizz.
- Dryness: Lack of moisture can make the hair strands more susceptible to static electricity and frizz.
- Heat Styling: Excessive use of heated styling tools can strip the hair of its natural oils and lead to frizz and breakage.
Castor Oil for Smoothing and Thermal Protection
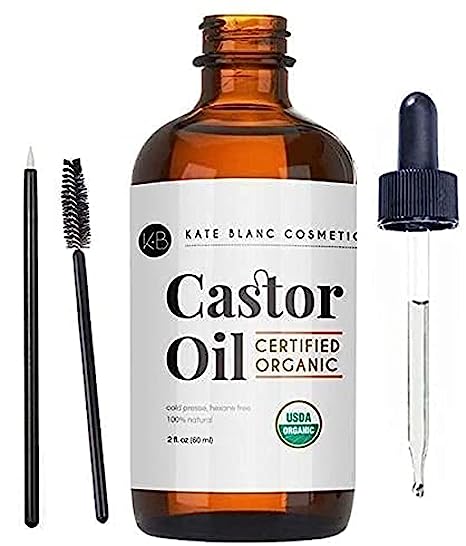
Castor oil, derived from the castor bean plant, has long been used for its moisturizing and protective properties. When it comes to managing frizz, flyaways, and wisps, castor oil offers several benefits:
- Deep Moisture: Castor oil is rich in fatty acids that penetrate the hair shaft, providing deep hydration and combating dryness.
- Sealing Cuticles: Applying a small amount of castor oil to the hair can help seal the cuticles, creating a smoother surface and reducing frizz.
- Thermal Protection: Castor oil can act as a barrier between your hair and the heat of styling tools, helping to minimize damage.
Applying Castor Oil to Manage Frizz
Follow these steps to incorporate castor oil into your hair care routine to manage frizz and flyaways:
- Choose Cold-Pressed Castor Oil: Opt for cold-pressed, hexane-free castor oil for the best quality and results.
- Preparation: Start with damp, towel-dried hair. You can also apply a small amount of castor oil to dry hair as needed.
- Dispense the Oil: Pour a small amount of castor oil into your palm. The amount you use will depend on your hair length and thickness.
- Spread Evenly: Rub the oil between your palms to warm it, then distribute it evenly through the lengths and ends of your hair.
- Avoid the Scalp: Be cautious not to apply too much oil to your scalp, as it may make your hair appear greasy.
- Style as Desired: You can let your hair air dry or proceed with your preferred styling routine. The castor oil will help protect your hair from frizz and thermal damage.
Store-Bought Alternatives for Frizz Control
For those seeking convenient options, the market offers an array of anti-frizz products designed to provide quick and effective solutions:
- Serums and Creams: Silicone-based serums and creams can be applied to damp or dry hair to control frizz and add shine.
- Leave-In Conditioners: Leave-in conditioners formulated to combat frizz can be applied after washing and conditioning your hair.
- Anti-Static Sprays: These sprays help neutralize static electricity and keep flyaways in check.
By incorporating castor oil into your hair care routine and exploring suitable store-bought products, you can effectively tame frizz, flyaways, and wisps, leaving you with smoother, more manageable hair.
Removing Product Buildup
Buildup from styling products, oils, and environmental pollutants can weigh down your hair, leaving it lackluster and difficult to manage. In this chapter, we’ll delve into the impact of product buildup on your hair’s health and appearance, and explore a powerful remedy: the baking soda power cleanse. Discover how this natural and effective method can deeply cleanse your hair and restore its natural vitality.
The Impact of Product Buildup on Hair
Over time, using various styling products, conditioners, and treatments can lead to residue buildup on the hair and scalp. The consequences of product buildup include:
- Dullness: Buildup can coat the hair shaft, causing it to appear dull and lifeless.
- Flatness: Accumulated products can weigh down the hair, reducing its volume and natural bounce.
- Limited Absorption: Buildup can impede the absorption of moisturizing products, making it harder for your hair to benefit from nourishment.
Baking Soda Power Cleanse for Deep Cleaning
Baking soda, a common household ingredient, can work wonders in clarifying your hair and removing stubborn buildup. This natural remedy is known for its ability to cut through grease and grime. Here’s how you can create and apply the baking soda power cleanse:
Ingredients:
- Baking soda
- Water
Method:
- Mix Baking Soda and Water: In a small bowl, mix about 1 tablespoon of baking soda with enough water to create a paste. The consistency should be similar to that of a thick shampoo.
- Wet Your Hair: Start with wet hair. Thoroughly wet your hair in the shower.
- Apply the Paste: Gently massage the baking soda paste onto your scalp and hair. Focus on areas with noticeable buildup.
- Massage and Rinse: Using gentle circular motions, massage the paste into your scalp for a few minutes. This helps break down the buildup.
- Rinse Thoroughly: Rinse your hair thoroughly with warm water, making sure to remove all traces of the baking soda paste.
- Condition: Follow up with a lightweight conditioner to restore moisture to your hair without adding excess weight.
Performing a Baking Soda Power Cleanse
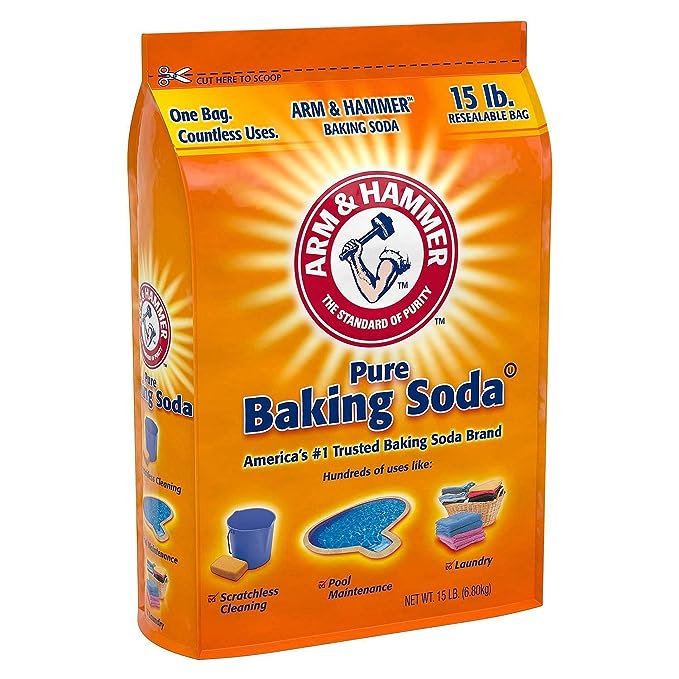
To effectively perform a baking soda power cleanse, follow these steps:
- Frequency: The baking soda power cleanse is not meant to be performed daily. Aim for once every 2 to 4 weeks, or as needed based on your hair’s condition.
- Patch Test: Before applying the baking soda paste to your scalp, perform a patch test on a small section of your hair to ensure you don’t experience any adverse reactions.
- Gentle Application: When massaging the paste onto your scalp, be gentle to avoid excessive friction or irritation.
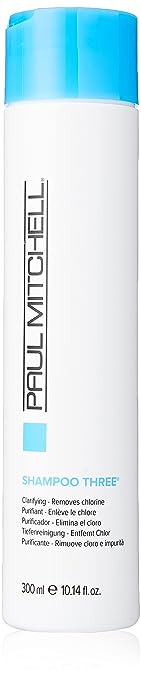
Clarifying Shampoos for Product Residue Removal
If you prefer a store-bought option, clarifying shampoos are specifically designed to remove buildup and residue from the hair. Look for shampoos that are labeled as “clarifying” or “deep-cleansing.” These shampoos often contain ingredients that help break down and dissolve product buildup, leaving your hair feeling refreshed and revitalized.
By incorporating the baking soda power cleanse or using clarifying shampoos into your hair care routine, you can effectively remove stubborn product buildup and restore your hair’s natural shine and bounce. Remember to follow up with proper conditioning to maintain the balance of moisture in your hair.
Controlling Dandruff and Flakes
Dealing with dandruff and flakes can be frustrating, but there are effective ways to address this common scalp concern. In this chapter, we’ll explore the causes of dandruff and provide you with a natural solution: the ginger root scalp spritzer. Discover how the unique properties of ginger can help soothe your scalp and minimize dandruff, leaving your hair and scalp feeling revitalized.
Understanding Dandruff and Scalp Health
Dandruff, characterized by the presence of white or grayish flakes on the scalp and hair, is often caused by factors such as:
- Malassezia Yeast: This naturally occurring yeast on the scalp can overgrow, leading to irritation and flaking.
- Dry Scalp: When the scalp lacks proper moisture, it can become dry and prone to flaking.
- Sensitivity: Some individuals have a more sensitive scalp that reacts to hair care products or environmental factors.
Ginger Root Scalp Spritzer for Dandruff Control
Ginger, a spice known for its anti-inflammatory and antifungal properties, can help address the underlying causes of dandruff and provide relief from itchiness and flaking. Here’s how you can create and use the ginger root scalp spritzer:
Ingredients:
- Fresh ginger root
- Water
- Apple cider vinegar (optional)
- Essential oils (e.g., tea tree, lavender) (optional)
Method:
- Prepare Ginger Infusion: Grate a small amount of fresh ginger root and place it in a pot. Add water and bring it to a gentle boil. Allow the mixture to simmer for about 15 minutes.
- Cool and Strain: Let the ginger infusion cool down, and then strain it to remove any ginger particles.
- Optional Additions: If desired, you can add a small amount of apple cider vinegar to the ginger infusion for its potential scalp-balancing properties. Additionally, a few drops of essential oils like tea tree or lavender can further enhance the treatment.
- Transfer to Spray Bottle: Pour the ginger infusion into a spray bottle for easy application.
Creating and Applying the Ginger Root Scalp Spritzer
To effectively use the ginger root scalp spritzer, follow these steps:
- Application: Apply the ginger root scalp spritzer directly to your scalp, focusing on areas where you experience dandruff or itchiness.
- Massage: Gently massage the spritzer into your scalp using your fingertips. This helps distribute the solution and encourages blood circulation.
- Leave-In: Allow the spritzer to sit on your scalp for about 30 minutes to an hour. You can cover your hair with a shower cap or towel during this time.
- Rinse: After the desired duration, rinse your hair thoroughly with water. If you used essential oils, make sure to rinse well to avoid any irritation.
Dandruff Control with Store-Bought Solutions
If you prefer a store-bought approach, there are dandruff shampoos available that contain active ingredients like pyrithione zinc, ketoconazole, or selenium sulfide. These ingredients target the yeast and fungus that can contribute to dandruff, providing relief from flakes and itchiness.
By incorporating the ginger root scalp spritzer or utilizing specialized dandruff shampoos, you can effectively manage dandruff and promote a healthier scalp environment. Regular use of these remedies can lead to a reduction in flaking and discomfort, allowing you to enjoy a confident and comfortable hair and scalp.
Chapter 13. Minimizing Excessive Hair Shedding
Experiencing excessive hair shedding can be disheartening, but there are steps you can take to address this concern and promote a healthier scalp. In this chapter, we’ll delve into the causes of excessive hair shedding and introduce a mayo-based hair mask that can aid in strengthening your hair and reducing shedding. Discover the power of this nourishing treatment and regain confidence in your hair’s vitality.
13.1. Addressing Excessive Hair Shedding
Excessive hair shedding can be caused by a range of factors, including:
- Nutritional Deficiencies: Inadequate intake of essential nutrients can weaken hair follicles and lead to increased shedding.
- Hormonal Changes: Hormonal imbalances, such as those related to pregnancy or medical conditions, can impact hair growth cycles.
- Stress: High levels of stress can disrupt the normal hair growth cycle, leading to more hair shedding.
Mayo-Based Hair Mask for Scalp Health
Mayonnaise, a common kitchen staple, is rich in fats and proteins that can provide nourishment to your hair and scalp. This mayo-based hair mask is designed to minimize hair shedding and promote scalp health.
Ingredients:
- Mayonnaise (full-fat)
- Egg yolk
- Olive oil
- Honey
Method:
- Prepare the Mask: In a bowl, combine a generous amount of mayonnaise with one egg yolk, a tablespoon of olive oil, and a teaspoon of honey. Mix the ingredients until you achieve a smooth and consistent mixture.
- Application: Section your hair and apply the mask evenly from roots to tips. Focus on massaging the mask into your scalp to promote circulation.
- Cover and Rest: Once your hair is coated with the mask, cover it with a shower cap or wrap it in a warm towel. Allow the mask to sit for about 30 to 45 minutes.
- Rinse: After the designated time has passed, rinse your hair thoroughly with lukewarm water. You may need to shampoo twice to ensure that the mask is completely removed.
Making and Using the Mayo-Based Hair Mask
To make the most of the mayo-based hair mask, follow these steps:
- Frequency: Use this mask once a week to promote hair health and minimize shedding over time.
- Scalp Massage: While applying the mask, take a few extra minutes to massage your scalp gently. This stimulates blood flow and encourages the absorption of the mask’s nutrients.
- Consistency: Consistent use of the mayo-based hair mask is key to seeing results. It may take several weeks to notice a reduction in excessive hair shedding.
Pre-Made Alternatives for Hair Shedding Prevention

If you’re looking for pre-made alternatives to address hair shedding, consider products that contain ingredients like biotin, keratin, and caffeine. These ingredients are often included in hair care products designed to strengthen hair and minimize shedding.
By incorporating the mayo-based hair mask into your hair care routine or exploring store-bought solutions, you can effectively address excessive hair shedding and work towards achieving a fuller, healthier-looking mane. Remember that hair shedding is a natural process, but with the right care, you can minimize its impact on your hair’s overall appearance and volume.
Adding Volume to Flat Hair
When your hair lacks volume and appears flat, achieving that bouncy and voluminous look can seem like a challenge. In this chapter, we’ll explore effective strategies to boost flat hair and introduce an oatmeal and almond oil hair mask that can help add the desired volume. Discover how to bring life back to your locks and enjoy a fuller and more vibrant hairstyle.
Strategies for Boosting Flat Hair
Flat and lifeless hair can be attributed to various factors, including:
- Genetics: Hair texture and thickness are influenced by genetics, which can contribute to flatness.
- Oiliness: Excessive oil production at the roots can cause hair to look limp and weighed down.
- Product Buildup: Accumulation of styling products and oils can flatten the hair and inhibit volume.
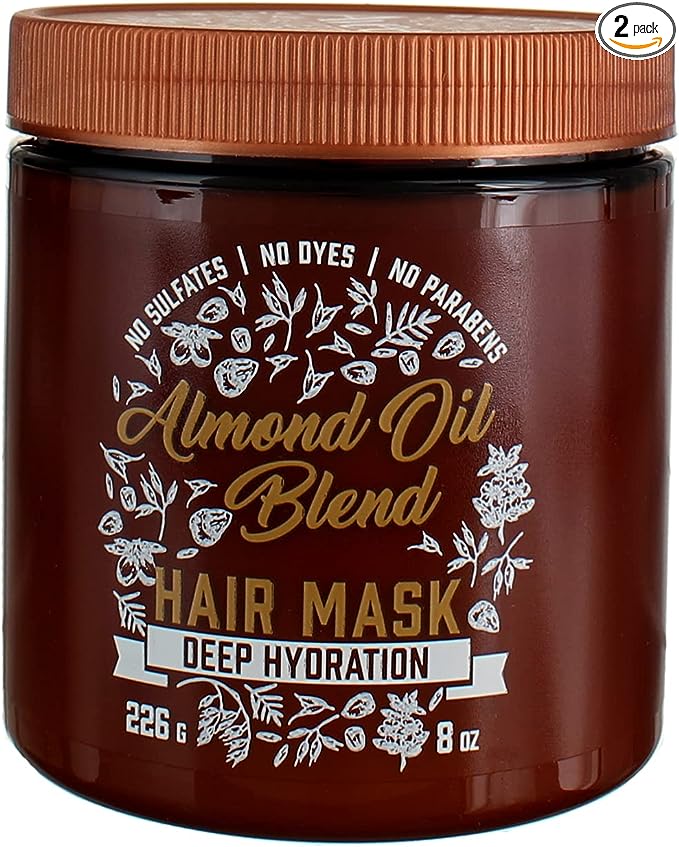
Oatmeal and Almond Oil Hair Mask for Bouncy Hair
Oatmeal and almond oil are two ingredients that can work wonders for adding volume to your hair. This homemade hair mask combines their benefits to give your hair a natural lift.
Ingredients:
- Oatmeal (finely ground)
- Almond oil
- Yogurt (unsweetened)
- Honey
Method:
- Prepare the Mask: In a bowl, mix a quarter cup of finely ground oatmeal with two tablespoons of almond oil, three tablespoons of unsweetened yogurt, and a tablespoon of honey. Blend the ingredients until you have a smooth paste.
- Application: Apply the mask evenly to your hair, focusing on the roots and working your way to the tips.
- Warmth and Rest: Cover your hair with a shower cap or wrap it in a warm towel. Allow the mask to sit for about 20 to 30 minutes.
- Rinse: After the designated time, rinse your hair thoroughly with lukewarm water. Use a gentle shampoo if necessary to remove any residue.
Step-by-Step Guide to Applying the Oatmeal and Almond Oil Mask
To effectively use the oatmeal and almond oil hair mask:
- Frequency: Apply this mask once a week to achieve and maintain voluminous hair.
- Massaging the Scalp: While applying the mask, gently massage your scalp in circular motions. This stimulates blood circulation and encourages hair growth.
- Root Focus: Concentrate the mask application on the roots of your hair, where volume is needed the most.
On-the-Go Hair Mask Options for Volume
If you’re looking for quick volume-enhancing solutions on the go, consider:
- Dry Shampoo: Dry shampoo helps absorb excess oil, adding texture and volume to your hair.
- Texturizing Spray: Texturizing sprays add instant volume and create a fuller appearance.
- Volumizing Mousse: Apply a volumizing mousse to damp hair before styling for added lift and bounce.
By incorporating the oatmeal and almond oil hair mask or using convenient on-the-go products, you can achieve the volume and bounce you desire for your hair. Experiment with different strategies to find the one that best suits your hair type and preferences, and enjoy a revitalized and voluminous hairstyle.
Conclusion
Congratulations on completing your journey through the world of DIY hair treatments! Throughout this guide, you’ve gained valuable insights into crafting effective homemade remedies to address a wide range of hair concerns. As you wrap up your exploration, let’s reflect on the key takeaways and tips for incorporating these treatments into your hair care routine.
Embracing DIY Hair Treatments for Gorgeous Hair
The allure of DIY hair treatments lies in their natural ingredients and customizable formulations that cater to your specific needs. By harnessing the power of nature, you can achieve healthier and more beautiful hair without relying solely on commercial products.
Tips for Incorporating Homemade Hair Treatments
As you integrate homemade treatments into your routine, keep these tips in mind:
- Start Slowly: Introduce one treatment at a time to understand how your hair responds.
- Consistency Matters: Regular use yields better results. Incorporate treatments into your routine based on your hair’s needs.
- Quality Ingredients: Choose high-quality, natural ingredients for the best outcomes.
- Listen to Your Hair: Pay attention to how your hair reacts to different treatments, and adjust accordingly.
- Patch Test: Perform a patch test before trying a new treatment to ensure you’re not sensitive to any ingredients.
Achieving Healthy, Lustrous Hair with Natural Remedies
By now, you’ve learned that a range of concerns, from dandruff to flatness, can be effectively addressed with DIY treatments. Armed with knowledge and a bit of experimentation, you’re equipped to enjoy healthier, more vibrant hair.
Remember that the journey to healthy hair is ongoing. As your hair’s needs change with seasons, lifestyle, and external factors, the flexibility of DIY treatments allows you to evolve your routine accordingly. Embrace the satisfaction of knowing exactly what you’re putting on your hair and reaping the benefits of natural, nourishing ingredients.
Thank you for embarking on this DIY hair care adventure. Your commitment to healthier, lustrous locks is a testament to your dedication to self-care and well-being. Here’s to the journey ahead and the beauty that natural remedies can bring to your hair.